Giving thanks!!

Happy Thanksgiving yall! I hope you’ve enjoyed spending time with family and friends along with great food! I’m thankful for my family and friends and all of you that take a little of your time to read my posts. 

We can safely say that there were a lot of passed down recipes made today. Im sure they were delicious. Of course we all have a few recipe horror stories…that sweet potato pie was my thorn…lol. However, the way I see it…you keep trying until you get it just right or you leave it alone if it doesn’t live up to what you thought it could or would be. As for me…I keep trying until I get it right. I love to tinker with recipe ideas. Sometimes an idea is better than a recipe because it gives you freedom to try different things.

Some of the memes on Facebook had me laughing so hard today because some people feel that there are some traditional recipes that should not be altered. I am the queen of alteration when it comes to a recipe. Don’t misunderstand me, sometimes a subtle change can make all the difference in the world and there are times when a major overhaul is in order. You know what I’m talking about…that quick recipe that you found and it looked so good in the picture. You had all of the ingredients, you prepared it exactly as written and it was flat when you tasted it for the first time. Your first thought was it needs a little something to jazz it up or OMG…never again…lol. I think these are the times that stimulate your creative juices in the kitchen. You decide to try something that could potentially be the best thing you’ve ever created! Trying the old with the new and learning how to put flavors together is a good thing! Now on a side note…I don’t ever want to see hotdogs cut up in my collard greens! I love them both but not together! There was a video posted about this…seriously…lol.

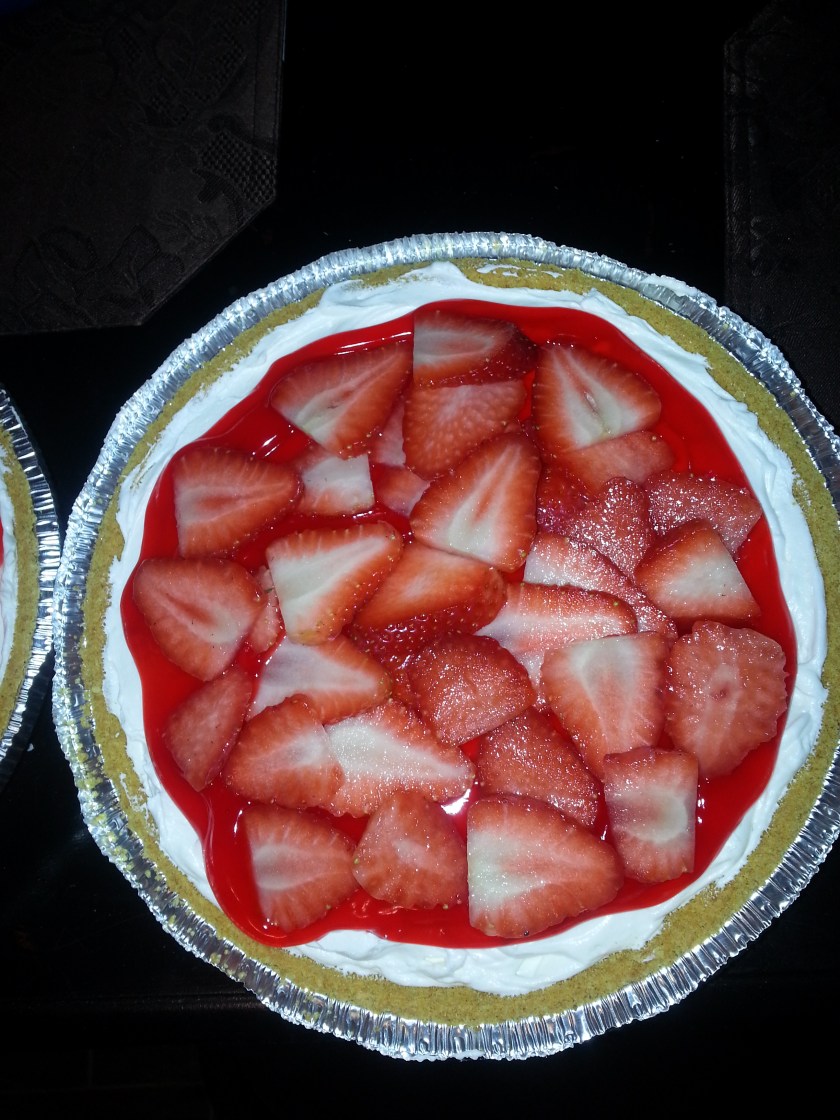
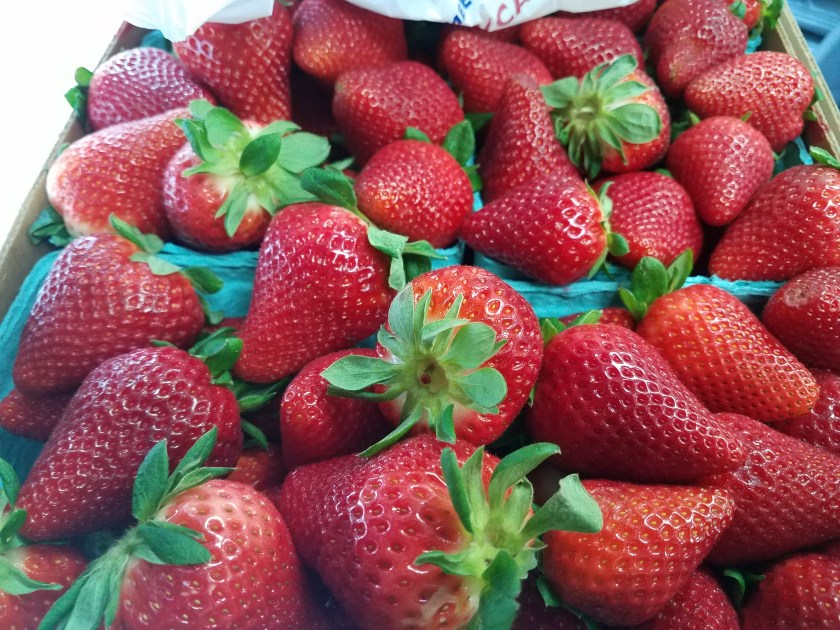
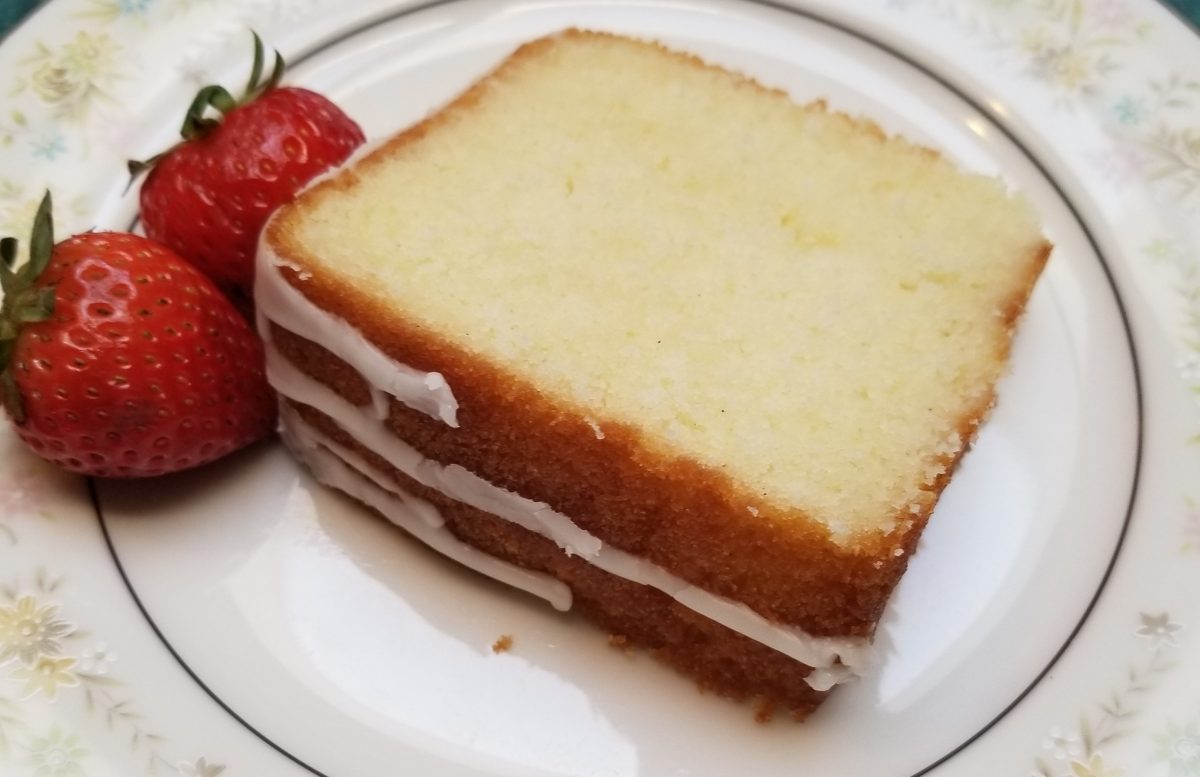
Some of my favorite Turkey day dishes are ham, turkey wings (the flat piece), baked macaroni and cheese, collard greens, mustard greens, succotash, potato salad, green bean casserole, cornbread dressing, cranberry sauce, and all of the desserts that come along for the ride. The chocolate layer cake is always a hit and sweet potato pie, strawberry cream cheese pie, chocolate supreme (my mama’s is the best), walnut pound cake, let’s just say I could be here for a while listing desserts…lol. 

Over the next few days, I’ll remix some leftovers and share the recipes with you…heres that creative juice in action. You don’t want to miss it!

It’s late and I hope that you’ve had a beautiful day with family & friends surrounded by great food! Stay positive and continue to move forward. Your kind word or smile could be the turning point for someone! Thank you for stopping by and until next time…cook with and for those you love!


Sherry’s Pineapple Cake

I went to visit a friend to begin my month long birthday celebration a few months ago and boy did we have a good time…laughing, talking, catching up. We all need to do that sometimes.  You know how it is when girlfriends get together…and although she didn’t cook for me…lol…I made her a cake that she has been requesting for quite some time now. So I’ve decided to name it after her. Fortunately, her family enjoys a little more sugar than she does. I had to add that in there because she was so happy when she started eating her slice and although her intention was to only sample a little she ended up eating the whole slice. She strives to eat very little sugar and this cake was definitely more than her normal share. However, the family was so glad I made it and truly enjoyed it as did she!

I think a little indulgence is warranted every now and then. Moderation is key to anything in life. Life would be boring without awesome sweet treats! The summer gardens offer so many great healthy choices that make it a lot easier for me to eat healthier.  So after eating healthy all week please treat yourself to a slice of this heavenly delicious pineapple cake with cream cheese frosting. It will make your tongue slap your brains out….lol! Yes, it’s that good! Let’s cook! Let me know what you think!


Sherry’s Pineapple Cake

Ingredients

3 sticks of butter (unsalted)

2 cups sugar

4 large eggs

3 cups of SRF (self rising flour)

1 1/2 tsp vanilla extract or pineapple

1 cup of whole milk

1/2 cup of pineapple juice


Filling Ingredients:

1 can of crushed pineapple

1 tbs SRF

3 tbs sugar

2 tbs butter

1/2 tsp vanilla

Directions:

1.  Pre-heat oven to 350°F.  Cream butter and sugar until fluffy.

2. Add eggs one at a time and mix until blended.

3. Add extract to the butter mixture.

4. Add a third of the SRF alternating with the milk and the pineapple juice. (for each cup of SRF add 1/2 cup of liquid) to the butter mixture.

5. Divide batter into three 8″ round pans that have been greased and floured or sprayed with Baker’s Joy(my fav). Bake in the oven for about 25 to 30 minutes. Bake times will vary depending on your oven. Check the center with a toothpick to make sure its done. Normally it will pull away from the sides of the pan when it’s done.

6. Remove from oven and let cool completely.

7. While the layers are cooling you will need to prepare the filling.


Directions for Filling:

You need a small pot. Combine butter and flour into a rue. Cook on medium heat until smooth. Add remaining ingredients. Cook until well mixed and it thickens slightly.


Preparing the cake:

One layer of cake then spread a generous amount of the filling on top. Make sure you leave a little space between the edge of the cake and the filling because it will ooze out the side of the cake if you’re not careful when you add the next layer. Once you have completed the layering process, you will use the cream cheese recipe from a previous post to ice the outside of the cake. Decorate the top with crushed pineapple.

Next step is to EAT!!!!  Thank you for reading and ENJOY!! Make sure to share with your family and friends! I’m super excited to be blogging again and I hope you enjoy the recipe! Let me know what you think in the comments.


Hey yall!

I know, I know, I know….where have I been? I had to take some much needed time to do some more research and learn more about this blogging business that I’ve jumped into! I do that sometimes. Sometimes you have to take the first step and learn as you go. I had only uncovered the surface to this enormous world of blogging. The possibilities are endless! So just to let you know…there will be a few changes coming. 

I love blogging and I want to make sure that I am able to give you, my readers, family, and friends the best of me! With that being said…I am looking forward to getting back in the swing of things and sharing more recipes, tips, and things I’ve learned along the way! I hope I haven’t lost y’all! I’m still ready to knock it out the box and I hope you’re ready to take the ride with me! Thanks for being here and taking the time out of your busy day to hang out with me! Until next post….get cooking and let me know what you would like to read about or learn to do in the kitchen. Enjoy life and move towards your dreams! I am!

Happy Mother’s Day!

Happy Mother’s Day!

I hope yall are enjoying each other over some phenomenal food on this beautiful Sunday! 

I appreciate all of the women who have had a hand in nurturing and guiding me throughout my life! Without them I wouldn’t be the woman I am today! Nor would I share these wonderful treats with you via this blog!

Dreaming is epic! You have to have a dream and don’t allow anyone to stop you from it.

My wonderful family and friends have always supported me in my endeavours and this is just one more time I get to say thank you!

Thank you all for supporting my dream! I love the skin I’m in and doing what I do! 

Over the last couple of weeks I’ve had the opportunity to help celebrate some great people with my cakes! Here is how they turned out! 


Remember to love and supoort each other. You never know what your kind smile, words of encoragement, or just being there to listen will do for someone else! It doesn’t cost a penny to be kind!

Love y’all and keep cooking!

Strawberry Bonaza continues….

Hey y’all! Last week I promised the other strawberry pie. So here we go…let’s cook!

It was my first time…cooking this pie. I was pleasantly surprised by this simple but ohhhhh sooooo delicious pie! I took it to work so that my taste tester co-workers could test it for me and boy did they enjoy it.

Who would have thought that strawberries in a strawberry gelatin syrup mixture surrounded by a flaky pie crust could be so sweet and refreshing at the same time?….don’t get me wrong…I like jello but I didn’t think I would want it presented this way….boy was I wrong! 

A few friends sent me recipes and from my understanding, this particular pie was a star at Shoney’s restaurants. So this is the knock off version. Well knock me off because I don’t think it will get much better than this. 

Shoney’s Copycat Strawberry Pie

Ingredients:

1 frozen (9-inch) pie crust
1 cup water
1 cup white granulated sugar
3 tbsp. cornstarch
1/4 cup strawberry gelatin powder
1 pint of fresh strawberries, hulled and sliced
Cool whip to spoon on as needed! Hmmmm makes it that much better!
Directions:
  1. Prebake pie crust according to directions on package. I usually prick it with a fork to keep the air bubbles at bay.
  2. Cool to room temperature
  3. Wash and hull strawberries. Then cut them in quarters.
  4. In a sauce pan, over medium-high heat, add water, sugar, cornstarch, & strawberry gelatin.
  5. Whisk together until thoroughly combined. Continue to whisk mixture constantly while heating to prevent clumping or scorching until mixture begins to come to a gentle boil.
  6. Remove pan from the heat and allow the glaze to cool. You may use an ice bath for the pot of you like.
  7. This will cool the glaze quickly and allow it to set up a bit more.
  8. As the glaze cools it will become translucent in color and you should notice it will thicken a little more as well.
  9. Whisk it occasionally as it cools. It will be thickened but still pourable.

  10. Add your sliced berries to the baked and cooled pie crust.
  11. Pour strawberry glaze over berries. Make sure they’re covered well. I like a lot if berries so my pie was piled too high. It was still awesome though!
  12. Chill pie in the refrigerator at least 2-3 hours before serving.
  13. Add cool whip to each slice when you serve it!

I hope you enjoy this recipe as much as I did! Let me know what you think!

Strawberry Cream cheese Pie

I hope y’all have had an exceptional weekend! I’ve been super busy as well…however it didn’t stop me from working with some berries today! You gotta love them! So much sweetness in such a beautiful little red and green package….lol. I don’t know what it is about strawberries that makes me so happy…lol…maybe it’s all the health benefits….naaaa….that’s all well and fine but to be honest…its the taste! That sweet yet subtle tartness that you get when you bite into a fresh strawberry this time of  the year. Woohoo….so good!

Speaking of health benefits….strawberries are a diabetics best friend in the fruit and vegetable food group. I recently read an article about all of the great things that strawberries give to the body. I think you may like it. Read it here: http://www.medicalnewstoday.com/articles/271285.php

Well the next thing for today is that pie recipe…I’ve come across several strawberry pie recipes and there are two that are especially good. 

My grandmother makes this pie and I have a few cousins who will almost fight about who gets to take one home…lol.  It only has a few ingredients and this recipe makes two pies. You can cut it in half if you don’t have that many mouths to feed…who am I kidding…you won’t  be able to stop eating it and you’ll wish you had a second once it’s gone….lol. 


Strawberry Cream Cheese Pie

Ingredients

2 Graham cracker pie crust

2 8oz. Pkg of cream cheese

1 Large tub of Cool whip

1 tsp vanilla

1 cup of sugar

1 pint of fresh strawberries, cleaned, hulled, and sliced.

1/2  container of strawberry gel or you could use strawberry topping

Directions

1. Cream sugar and cream cheese together in your mixer until light and fluffy.

2. Add vanilla and cool whip. Mix until it’s incorporated. (Don’t mix more than a minute or two). You don’t want to break your mixture like I did because I wasn’t multitasking very well…lol.  No one is perfect. Stuff happens…let it go and try again!

3. Split the mixture between the two Graham cracker pie crusts and top with gel and fresh strwberries.  Refrigerate for at least 2 hours or until it sets.


20140112_192053

Let me know what you think! Its sure to be a hit at a family function or friendly outing this summer.

Well, that’s all for now…you’ll get the other pie recipe next week. Thanks for reading and get cooking with those you love.  Let’s cook!

Congratulations goes to…..

Drum roll please…………..

The winner of the strawberry recipe contest is: Beverly Stanley with a strawberry pie!

Beverly please contact me to schedule a time to receive your prize!

Please stay tuned for the recipe that will follow and pictures of course!

Thank you to all who participated. Thank you for reading and if you have any recipes that you would like to see featured please feel free to contact me via email at sheca@shecacooks.com. 

Follow Sheca Cooks via email and subscribe to the blog. 

Remember….cook with those you love and enjoy!

Berries, berries, good ole berries!

Hello all, how are you? I just want to quickly remind you that you still have time to give your suggestions on last week’s post!  What would you like the feature strawberry recipe to be? Remember you must subscribe to the blog and post your suggestion in the comments to potentially be a winner! Good luck and I look forward to reading your suggestions.  Thank you to all who have made suggestions already!

LET’S COOK!

Strawberry Time!!

Hey everyone! I hope this cloudy day has not dampened your spirits! If so cheer up because it’s STRAWBERRY SEASON! My favorite time of the year. So in honor of that….I’m asking you…my readers…what you would like to see me create with some ripe, gorgeous, sweet, juicy, delicious, strawberries? List it in the comments. I will pick one lucky reader and that recipe will be featured on the blog! Who knows….if you’re local you may just receive that recipe! So let me know what you’re thinking about…I’m so ready and I can’t wait to hear your suggestions! 


20170418_142907
Fresh picked from Lewis Farms in Wilmington, NC

1492543714640-1305003638

Easy Peach Cobbler

Hey Yall!!!!  I missed all of you and I missed blogging the last few weeks due to flu and sinusitis….I told you pollen and I have a love/hate relationship…lol…however, I’m back…nothing can keep me down for too long! I’m so glad to be back! What have you been cooking while I was away?

This post will be short but super sweet! I want to give you one more of what I call a cool weather recipe yet it tastes great in any season. It can be made anytime and it really hits the spot during the summer with a cold scoop or two of vanilla ice cream. I found the original recipe in one of Paula Dean’s recipe books a while ago.  Although it tastes great as is, I thought it needed something. The original recipe didn’t include any spices or flavoring. So I decided to add my own twist to this great yet quick classic. You can change the spices to suit your taste or leave them out altogether.  

I’ve had a lot of friends tell me how they’ve enjoyed it and it’s always a hit when the family gets together! Let me know what you think. Did I mention that it takes less than an hour from start to finish?….well it does and it’s so worth it!  Let’s cook!


Easy Peach Cobbler

Ingredients:

1 stick of unsalted butter

1 cup of self rising flour

1 cup of sugar

1/2 tsp cinnamon

1/2 tsp nutmeg

1/4 tsp allspice

1 tsp vanilla

3/4 cup of whole milk

3 cups of sliced peaches in the syrup


Directions:

  1. Place the stick of butter in a baking dish (9 x 13). Place it in the oven on 350° F. Allow the butter to melt. (It will only take a few minutes).
  2. While the butter is melting, in a large medium mixing  bowl, combine the next five ingredients. No need to sift if you use a large fork to stir. Just make sure it’s combined well.
  3. Create a well in the bowl and add your milk slowly to avoid lumps. Stirring the mixtures until it comes together. Then add your vanilla.
  4. The butter should have melted by now and been removed from the oven. Yes, you will now add the wet mixture to the baking dish while it’s hot. Now spoon the peaches on top of the mixture…DO NOT STIR…pour the syrup over the entire mixture.
  5. Bake in the oven for 45-50 minutes on 350° F.  It will be golden brown and bubbly when done.
  6. Enjoy hot or wait until it cools a little so you won’t burn your mouth. Smile…it always makes me smile.


Sometimes, I just can’t wait until it cools. It’s so delicious. You can use just about any fruit in this quick recipe. It can be fresh, frozen, or canned. I’ve tried them all and it works well with each.